Mixing in logic pro x ever since the release of versions 10.5 and beyond has given us a number of unique tools and hacks that make achieving a cohesive sound easier and a lot more streamlined.
If you run your own studio or online mixing service like us, these tips will help you finish client projects faster and teach you more proficient ways to use the new Logic.
10.5 was a major update that brought plenty of new features to users, however, since then version 10.6 has also been released with features that can enhance your workflow further
Not only have features been added but existing algorithms have been updated which has improved the performance of older functionality.
1. Colour coding your tracks
Now this isn’t a feature that has been shipped with the latest version of logic, but it is incredibly important to do before starting your mix.
Colour coding your tracks is essential if one of yours goals is to improve the efficiency of your workflow, doing so will create a nice visual reminder of where grouped elements of your song are and make them easier to find when working at speed.
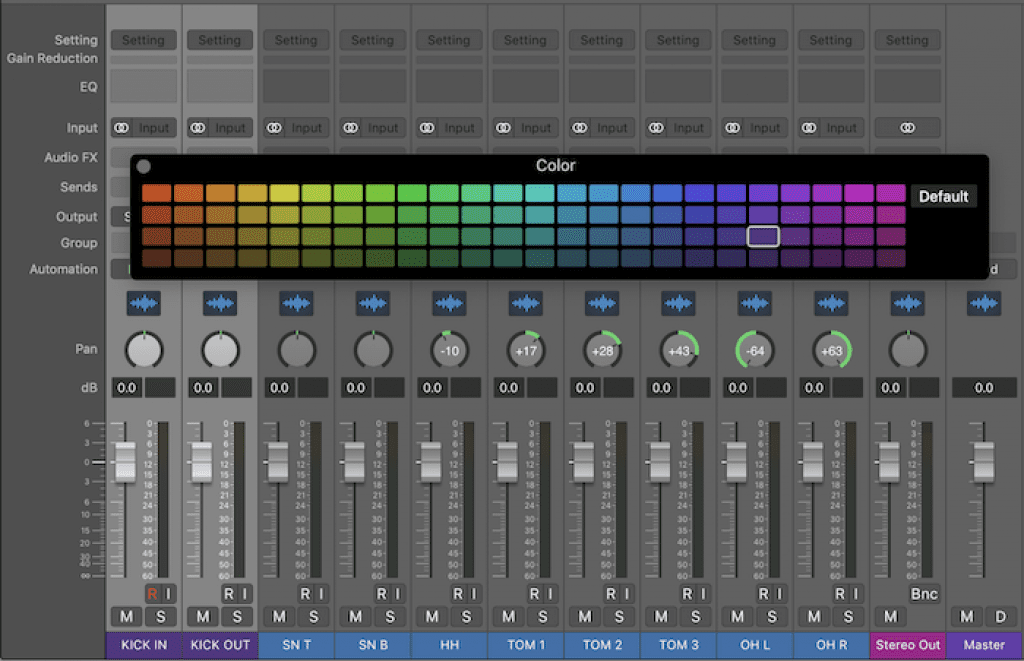
Before colour coding your tracks you may find it easier to have your mixer open on a separate screen (if you have dual monitors) to open it simply use this shortcut “Command + 2“, this will then set your mixer to full screen and you will be able to drag and drop it from your main screen to your secondary monitor.
To begin colour coding your tracks open the colour picker by using the shortcut “Option + C” this will then open the window that you see in the image above.
To set a colour for multiple tracks at once, first ensure that they are selected by holding down Command and clicking the tracks.
Once you have selected your tracks you can now choose a colour from the palette by clicking the colour you want and then repeat the process for the remaining elements in your session.
2. Setting Your Sample Rate
If you’re yet to record your session then this tip will not only make the quality of your recording better but will make the mixdown process easier.
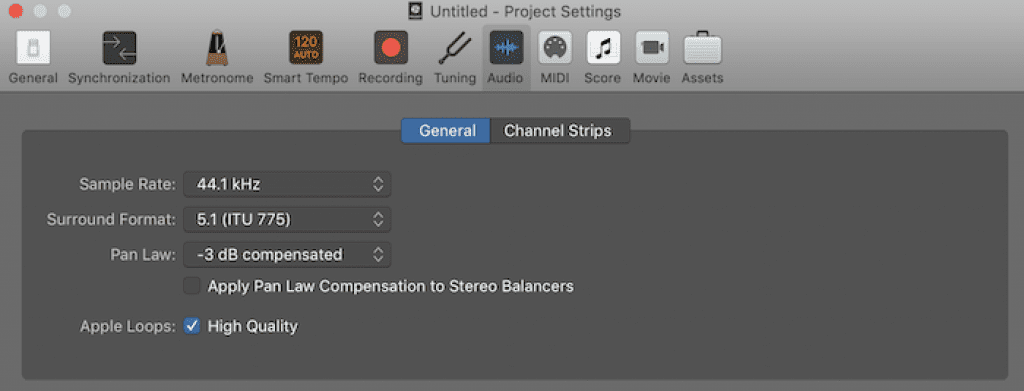
By default, logic sets your sample rate at 44.1 kHz, whilst this is fine in most instances setting it a little higher will result in a much better quality recording.
There are options to set your sample rate as high as 192 kHz, but most engineers tend to stick between 48 kHz and 96 kHz, it is also worth noting that the higher you set your sample rate will result in larger file sizes.
To change your sample rate simply go to File > Project Settings > Audio and test setting is right for you.
3. Setting Your Bit Depth
Setting your Bit Depth is also an incredibly important part of the recording process and will in turn improve the efficiency of your mixdown later.
Bit Depth determines the overall dynamic range of your project, there is 6 dB of headroom in each bit, so a bit depth of 24 offers 144 dB of dynamic range, You can set bit depth from the Logic Pro X > Preferences > Recording Menu.
By default, Logic’s bit depth is set to 16. You can change it 24 by checking the box in the Recording menu. 24-bit recording creates a much lower noise floor.
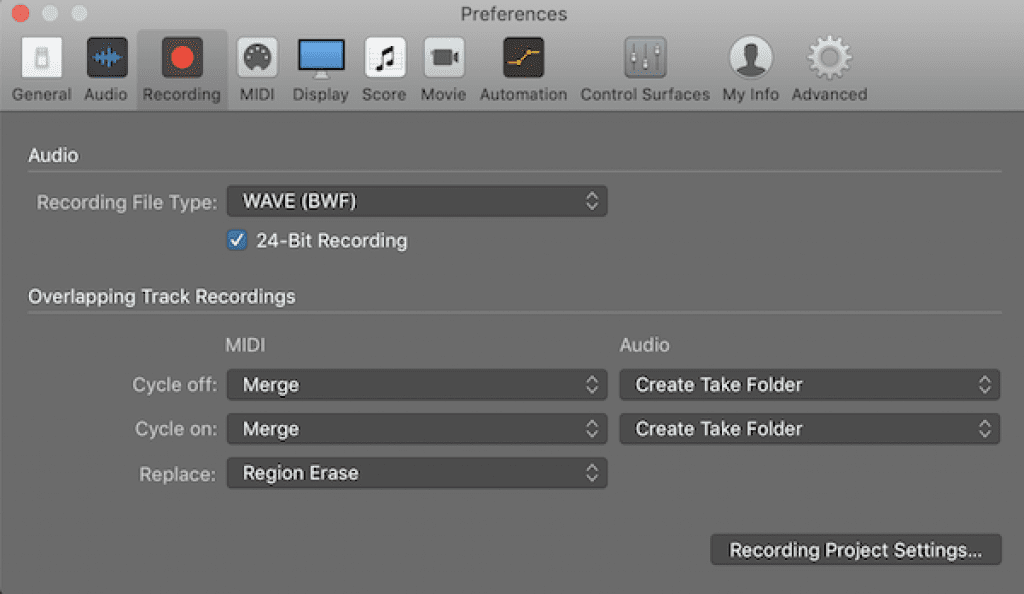
A higher bit depth just like a higher sample rate will also contribute to larger file sizes.
4. Normalizing Your Tracks
Otherwise known as Gain Staging, Normalizing your tracks can sometimes be frowned upon by most engineers, as in most instances it completely maxes out any headroom within your file taking volumes to 0 dB.
But Logic has a magic tool that when used correctly gives you greater control then ever before.
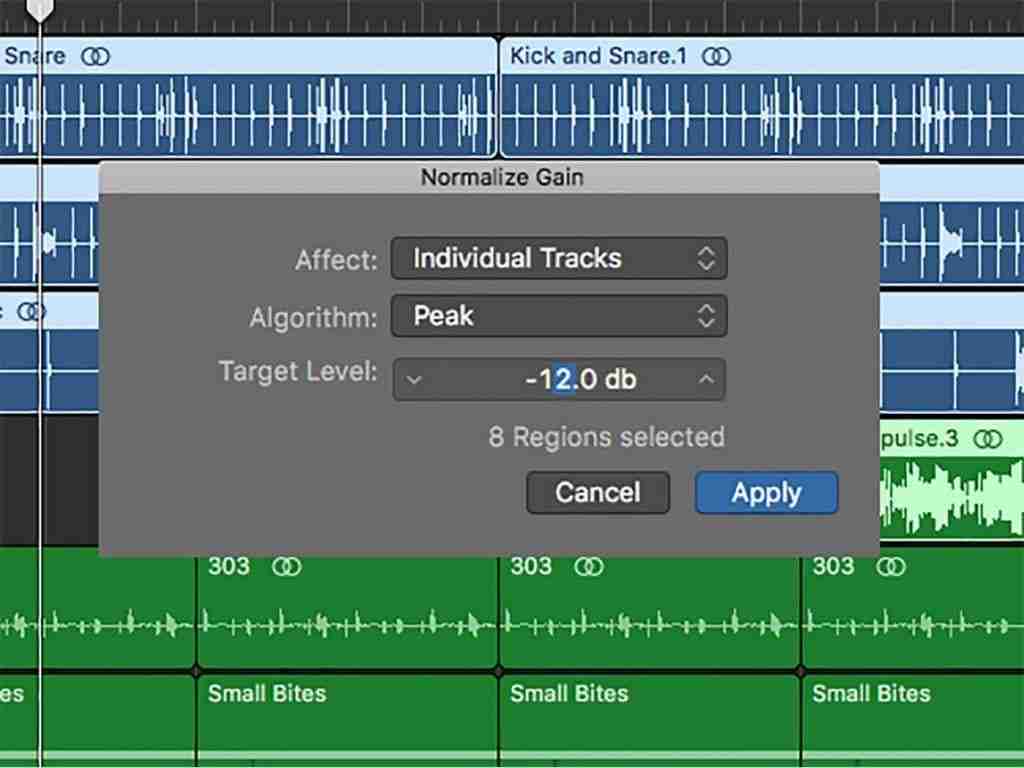
Logic’s Normalize Region Gain function puts the power back in your hand, instead of pinning your levels to the top of Logic’s meters this tool allows users to set their own target level, meaning that some headroom will be retained.
Here is how to use it in simple steps:
- In the Logic Pro Tracks area, select one or more audio regions. You can select all regions in a track by clicking the track header.
- Choose Functions > Normalize Region Gain.
- In the Normalize Gain dialog, do the following:
- In the Affect pop-up menu, choose whether individual regions, individual tracks or the entire selection are normalized.
- In the Algorithm pop-up menu, choose the normalization algorithm to use.
- Use the Target Level value slider to set the intended level of normalization (in decibels).
- Click Apply.
5. Adjusting Q using your cursor
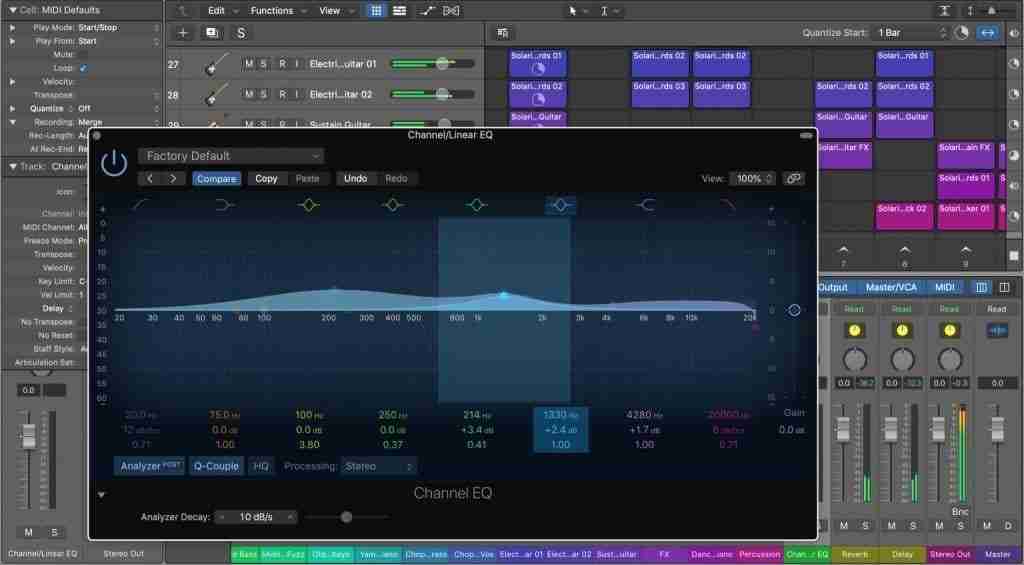
Now this may not seem like a big deal, but I should tell you that this wasn’t possible in previous versions of Logic, it’s safe to say that Apple have been a bit behind on this one while other DAW’s adapted this feature early.
It is now possible to adjust the Q setting on the selected band in the Channel EQ by moving the cursor.
Using a function such as this is something that every logic user should take advantage of as it will greatly improve your efficiency, saving time doing small tenuous tasks such as this will be of massive benefit to you in the mixdown process.
6. Set up your reverb using an Aux return
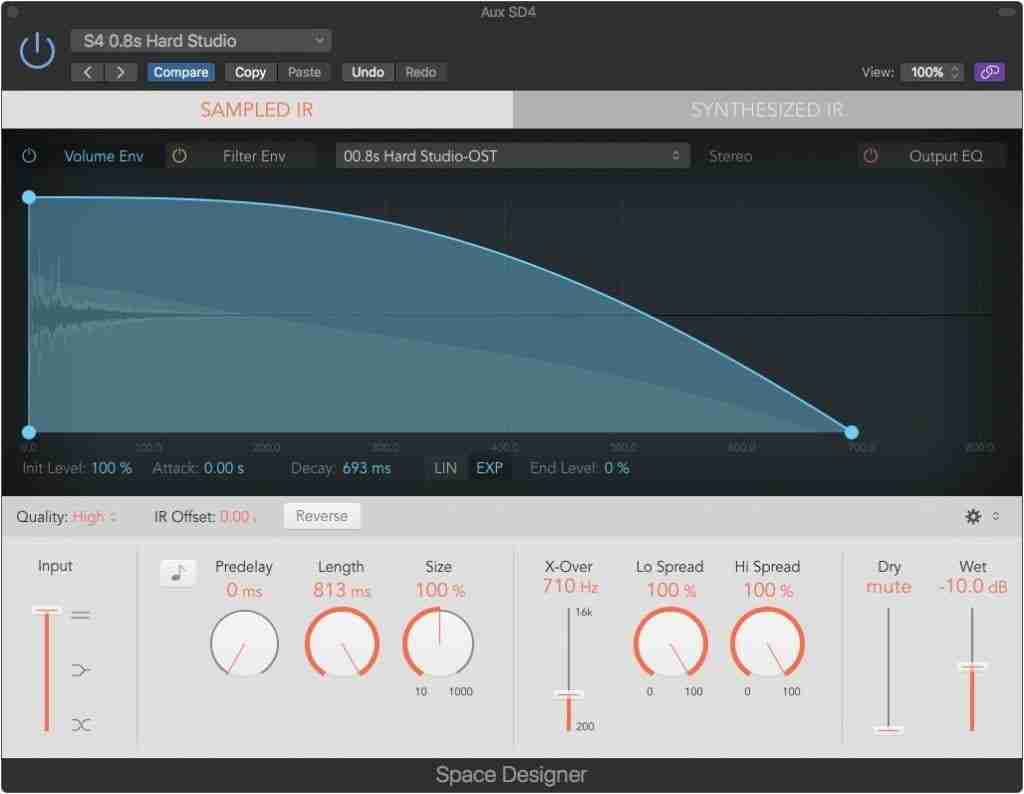
You may feel the need to set up a reverb on each and every track, but please refrain from doing it
Running reverbs through a send is a much more efficient way of getting the job done, most DAW’s will want you to create an Aux track manually, but in Logic its as easy as choosing an available Buss and then Logic will take care of the rest and create a properly routed Aux track for you.
Simply choose what track you want to affect, select a Buss and your nearly done, next you’ll want to jack up the send level, you can do this by selecting the volume knob in the mixer and turn it up.
Lastly you can load up and instance of your favourite reverb and start adjusting the controls to your desired setting.
7. Sample Replacement
When you’re in the mixdown process it may sometimes be necessary to replace a sample, i.e. replacing a live snare with a synthesized one, or even an entire drum take.
Here is how you can do it quickly and easily:
1. In Logic Pro, select the audio track with the drum recording.

2. Choose Track > Replace or Double Drum Track (or use the corresponding key command). The following changes take place in the Tracks area:
- All files on the selected audio track are analyzed for transients (if they have not been previously analyzed). The selected track is vertically zoomed.
- A software instrument track is created below the audio track, and the Sampler instrument is inserted into the Instrument slot.
- The Library opens with the Sampler instrument selected so that you can choose the sound that best matches the project.
- A MIDI region containing trigger notes based on the detected transients is created on the software instrument track.
- The Drum Replacement/Doubling dialog opens.
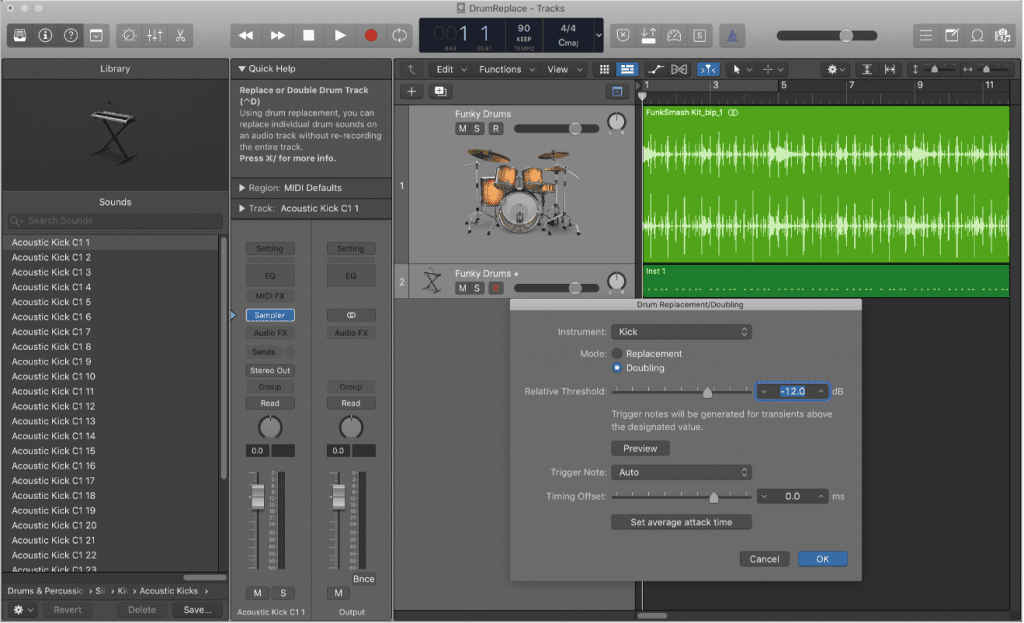
3. In the Drum Replacement/Doubling dialog, set the following parameters:
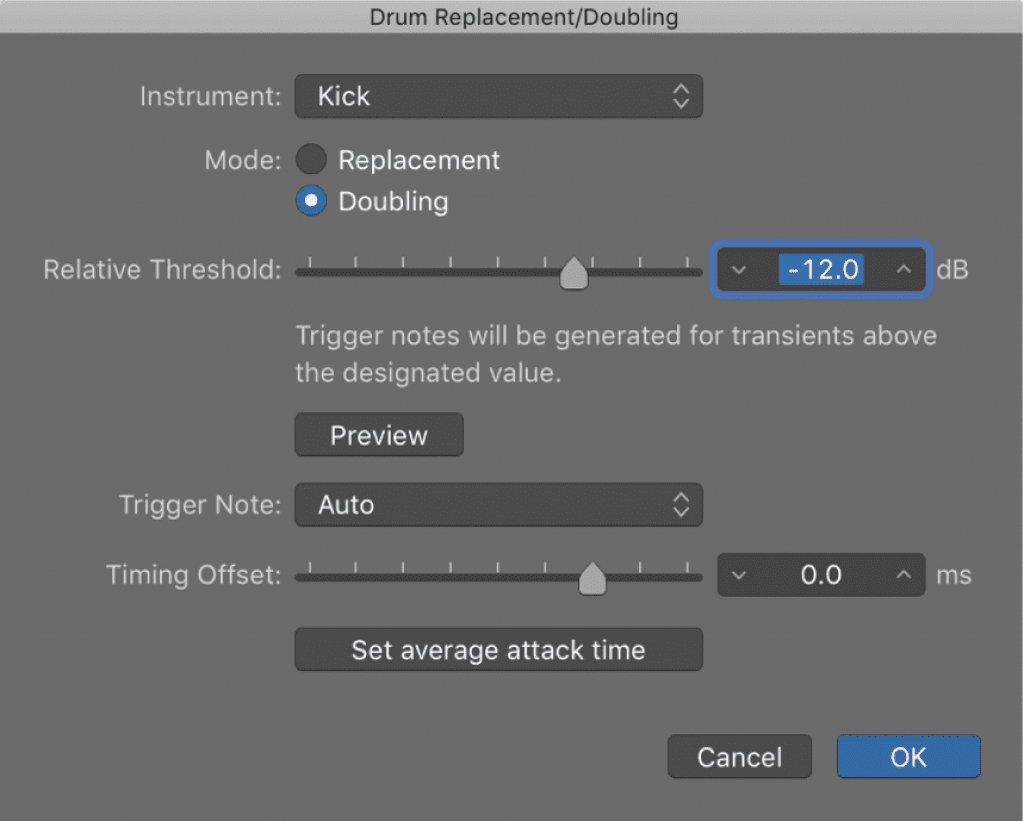
- Instrument pop-up menu: Choose the drum sound you want to replace or double (Kick, Snare, Tom, or other).
- Mode buttons: Choose one of the following modes:
- Replacement: The new sound replaces the original, and all regions on the original track are muted.
- Doubling: The new sound is added to the original (the original sound is not muted).
- Relative Threshold slider: Set the threshold value for transients, above which trigger notes are generated.
- Preview button: Click to start playback of both the original (audio) and replacement (software instrument) track from the current playhead position. The two tracks are soloed, so all other tracks in the project are silent. You may want to set the playhead or activate the cycle area to preview a part of the project requiring special attention for drum replacement. Click Preview again to stop playback, return the playhead to the previous play position, and un-solo the two tracks.
- Trigger Note pop-up menu: Set the pitch of the trigger notes created on the software instrument track. Choosing AUTO (the default setting) sets the trigger note as follows:
- Kick = C1 (36)
- Snare = D1 (38)
- Tom = A1 (45)
- other = C3 (60) and AUTO menu not available, as there is no automatic choice for this setting. Note: Any changes to the trigger note do not change the instrument setting. However, any changes to the instrument setting change the trigger note, either to Auto or C3 (60).
- Timing Offset slider: Shift the position of trigger notes earlier (negative values) or later (positive values). The offset should normally be set to 0.0 ms (which places the MIDI trigger notes exactly at transient timing positions), but may need to be adjusted when using your own, or third-party, instruments.
- “Set average attack time” button: Set the average offset of all regions on the source audio track.
- Click OK to confirm the action. Clicking OK resets the vertical zoom of the original audio track mutes its regions if you selected the Replacement option, and deselects the track. MIDI trigger notes for the Sampler instrument are created on the software instrument track, and the track is selected.
8. Copy and paste channel strip settings
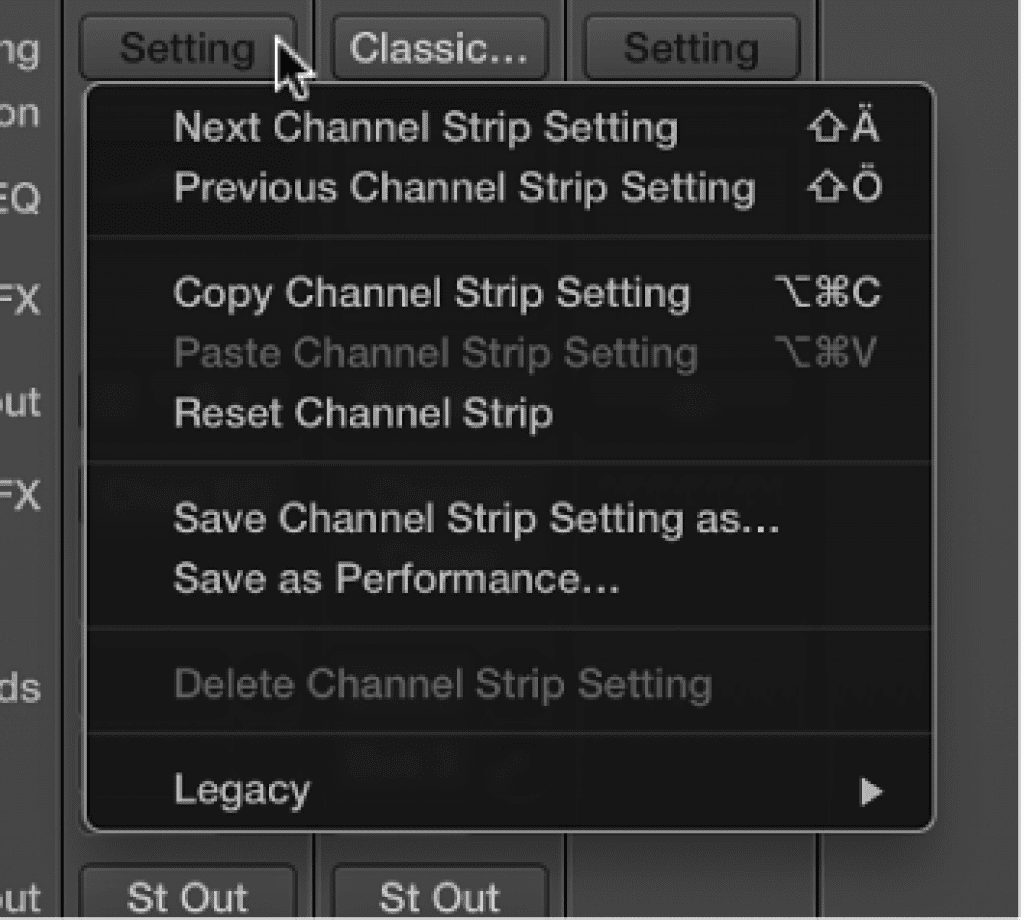
Whilst we have already covered a good amount of mixing workflow enhancers, Logic doesn’t stop there.
Do you ever find yourself copying and pasting the same channel strip settings over to a different track? or setting up the same send assignments and it feels like you’ve already done it a thousand times in the same session?
Well in the latest version of Logic you can copy and paste channel strip settings from one track to the other all at once.
All you have to do is go to settings at the top of the track that you want to copy and select Copy Channel Strip Setting.
Then head over to the channel you want to paste the settings onto, select settings again, and hit Paste Channel Strip Setting.
Logic has 3 different options for pasting Channel Strip Settings:
- Paste Channel Strip Setting – which pastes all aspects of the previously copied Channel Strip (fader, level, panning, plug-ins and send assignments)
- Paste Plug-ins Only – which pastes the entire plug-in chain only of the previously copied Channel Strip
- Paste Sends Only – which pastes the Send assignments and levels only of the previously copied Channel Strip
Whilst pasting all of your Channel Strip Settings is helpful, there maybe some instances where you only want to paste Plugins or Sends, so familiarising yourself with these options is a must.
9. Quick swipe comping
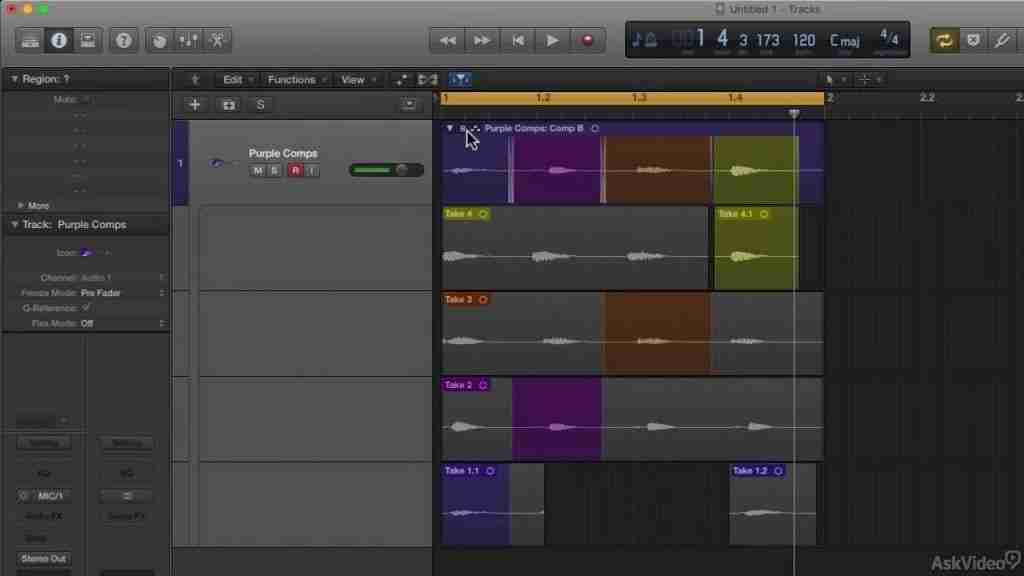
If you don’t already know that this feature exists I forgive you, it took me a while to figure it out, quick swipe comping is a feature that allows you to quickly create comps with ease.
Imagine a situation where you have a lot of takes but you want to use different parts from each one, comping is an easy way to select the takes that you want to play back to see how they sound together before you make any final edits.
In Logic Pro, do one of the following:
Click the Quick Swipe Comping button in the upper-left corner of the take folder.
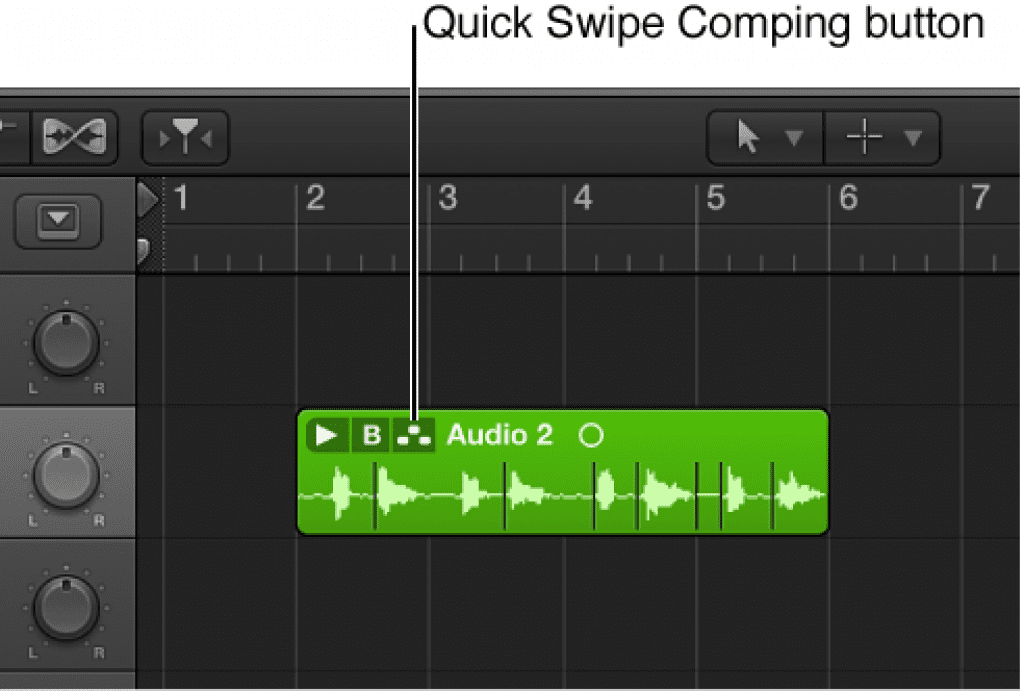
Choose Quick Swipe Comping from the Take Folder pop-up menu.
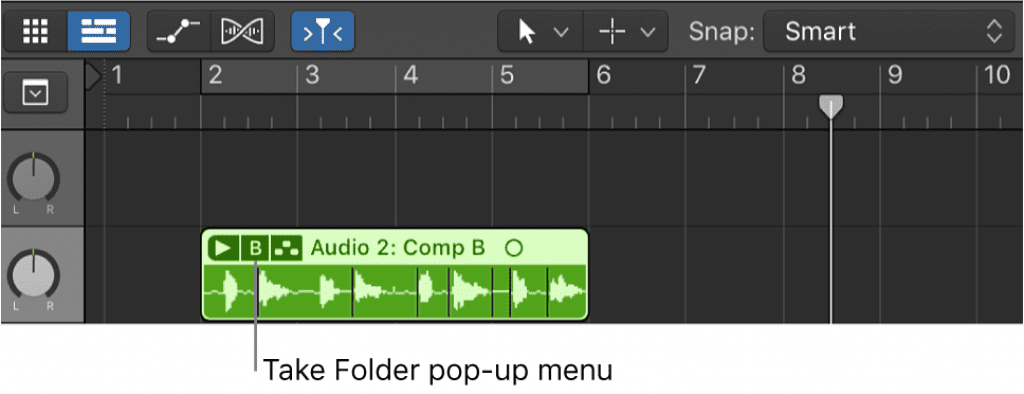
10. Use Distortion to Add Tube Warmth to Your Bass
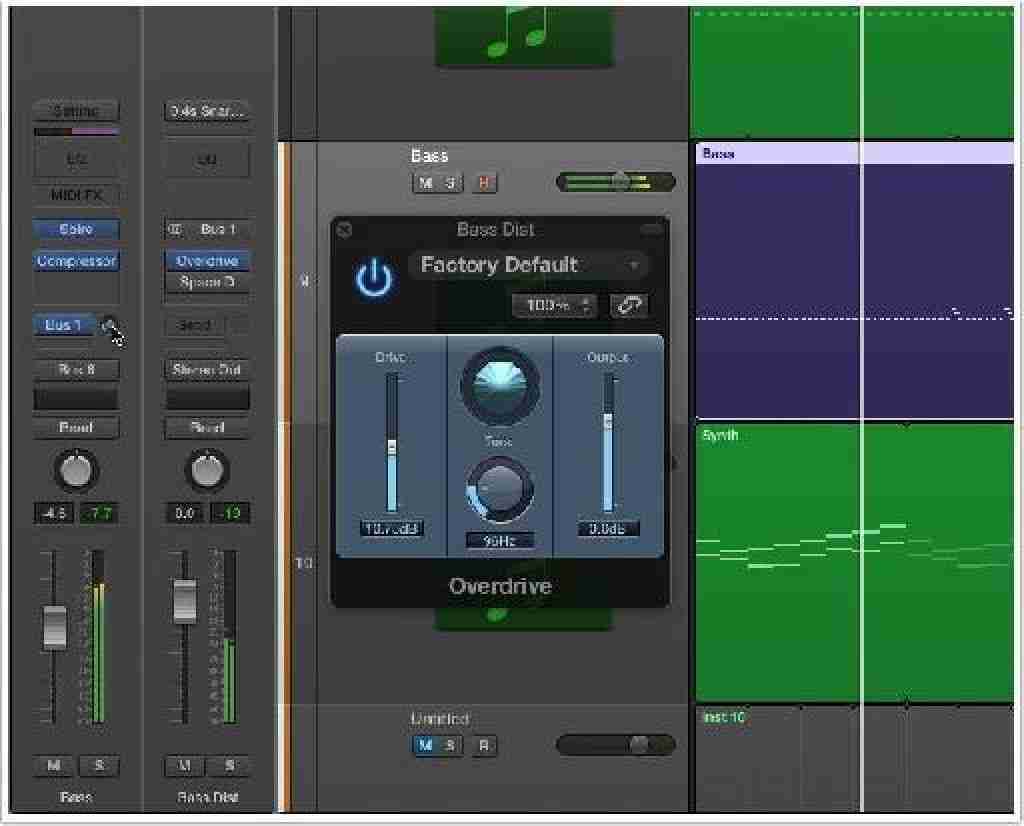
When most people think of distortion they think of a gritty dirty sound. Using distortion in a more subtle way, however, can add vibe and analog warmth to your bass sounds.
When used on a bus/send you can use the send knob to extend the depth without affecting the original sound. Use an available bus and add the Overdrive effect to its auxiliary track. Try a setting close to the one in the image below, then slowly add as much extension as you need by turning up the send knob.
Recommended:
- 10 Advanced Logic Pro X Tips for Dummies
- How to Build Your Own Kontakt Instrument In 6 Steps
- How To Control Any Parameter In Logic Pro X


