With this tutorial, you will learn how to create slowed and reverb versions of your songs, using your Digital Audio Workstation and the popular online tool SlowedAndReverb.Studio.
It doesn’t matter what DAW system you use, each system will have the same if not similar functionality to replicate the steps within this guide and produce the same desired results to slow down the song of your choice.
For this example, I will use Ableton 11. Still, the same result will be easily achievable in later versions and other Digital Audio workstations such as Audacity, Logic Pro, Pro Tools, Adobe Audition and many more.
Table of Contents
How to Slow and Reverb a Song in Ableton
Video Tutorial
Step #1 – Import Your Audio
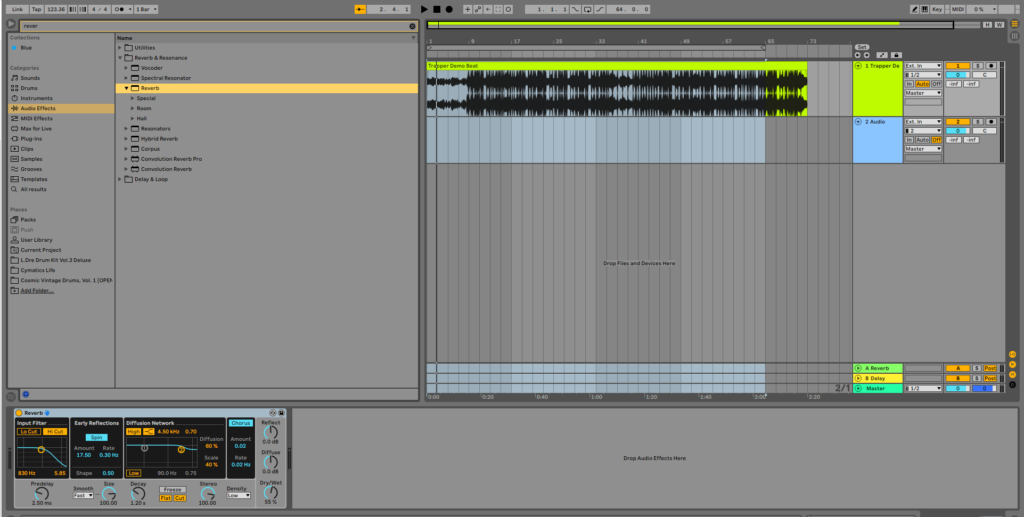
Import your song of choice onto the arrangement window of your DAW.
For this example, I’ll use the Trapper Demo Beat from our sample pack Dark Drill Melodies.
First place your audio on any Audio Track within your DAW.

Step #2 – Change The Pitch
Next, if you’re using Ableton, double-click the piece of audio that you imported, this will bring up the editor window that will show at the bottom of the screen.

You will notice Ableton’s Warp Mode will be applied by default (it is for me at least, you may have turned that option off).
If Warp Mode is applied, turn it off by clicking the yellow button that says “Warp“.
Some people apply this effect with warp settings on, but the slowed and reverb effect sounds better with warp-off.
From here you can start to play with the pitch wheel which ultimately changes both the pitch and by extension the tempo of the slowed and reverb remix.
For this example, I have pitched down -2 semitones:

Which has taken the audio from sounding like this:
To now sounding like this:
This has now taken the original audio from 140 bpm to around 123.36 bpm, after using Ableton Lives native Tap Tempo function.
Step #3 – Apply Reverb
The next thing to do is to apply a reverb to your effects chain.

There’s no fixed amount that you should apply, playing with the settings of your chosen reverb is the best way to gain the results that you desire.
Personally on slowed and reverb remixes, I prefer minimal reverb.
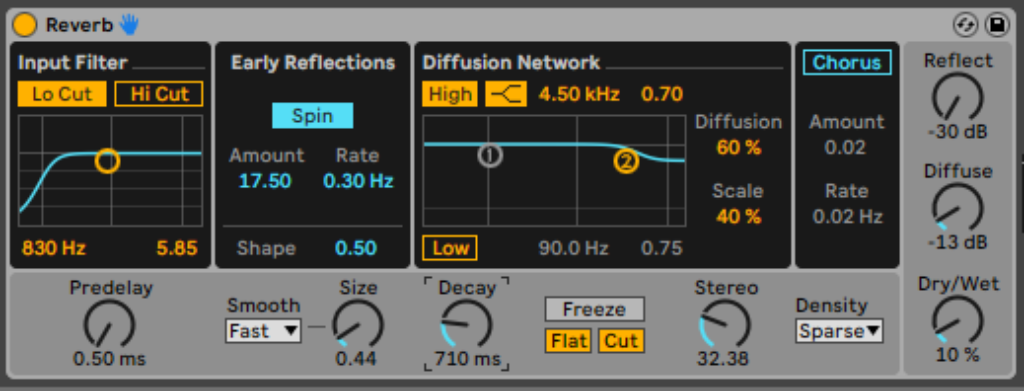
Here is a snapshot of my settings:

Reverb Settings:
- Pre-delay: 0.50 ms
- Size: 0.44
- Decay: 710 ms
- Stereo: 32.38
- Reflect: -30 dB
- Diffuse: -13 dB
- Dry/Wet: 10%
Here is how the remix sounds with reverb applied:
That is how you create a slowed and reverb remix natively within Ableton, next, I’ll show how to do the same using SlowedAndReverb.Studio.
How to Slow and Reverb Using SlowedAndReverb.Studio
Creating a slowed and reverb remix is easy in pretty much any DAW you use (Ableton, Audacity or FL Studio, it doesn’t matter) as it only requires a handful of steps.
However, online tools such as SlowedAndReverb.Studio make it even easier to execute as you don’t even need to open a DAW or do any audio editing.
Let’s get started.
Step #1 – Head over to SlowedAndReverb.Studio
First, head over to the website SlowedAndReverb.Studio.

Step #2 – Choose your Audio File
Next hit the button that says, “Choose an Audio File to get started” and upload your original audio.

Step #3 – Change the Settings

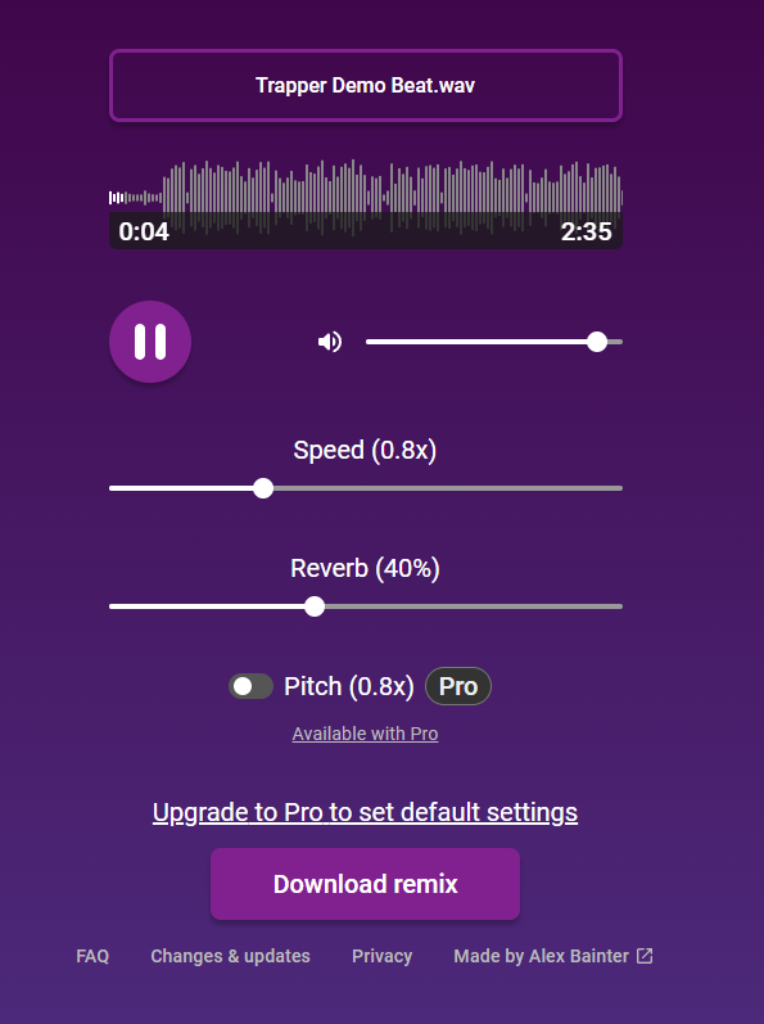
Next, once your audio is uploaded it’s as easy as playing with the settings until you find a sound that you like.
The settings that you see above are the default settings that the generator will default to.
For this example I have changed the settings slightly to suit my own preference:
Here is the audio that I downloaded:
The settings applied:
- Speed: 0.8x
- Reverb: 10%
As you change the settings SlowedAndReverb.Studio will automatically play back the song.
Step #4 – Download the Remix
Once you’re happy with how the remix sounds, hit the button “Download remix“.


